Here's the timeline to guide you in building this DIY down firing active subwoofer.
00:00 - JBL Stage 810 Subwoofer Owner's Manual. Data for such thiele-small parameters, enclosure size, port length, etc.
00:10 - My preferred subwoofer enclosure designing software is Box-Port Design II. You can download it in this link
box-port-design.software.informer.com/2.2/ Available only for PC (Windows).
00:22 - Layout, design and dimensions of the down firing subwoofer enclosure using web application Tinkercad. Get it at this link
www.tinkercad.com/things/8thbkbSIggd-diy-down-firing-active-subwoofer-jbl-stage-810#/00:32 - Cutting MDF board main panels using DIY table saw.
00:43 - Gluing the main panels together. Top and bottome panels. Sealing the enclosure using the same wood glue.
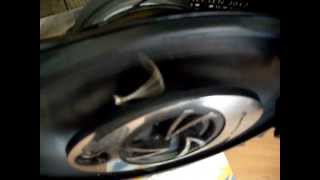
00:57 - Cutting the subwoofer hole using palm router and a DIY circle cutting jig made of acrylic plastic.
01:24 - Flush mount the subwoofer speaker using a rabbeting router bit.
01:45 - Cutting MDF board for front, back and middle panels.
02:04 - Cutting the port tube hole on front panel.
02:13 - Cutting the amplifier board plate panel.
02:33 - Flush mount the amplifier board plate by cutting the MDF panel using rabbeting bit again.
02:48 - CheeChong the French Bulldog is helping! LOL
03:13 - BLOOPER! :)
03:25 - Gluing down middle, front, and back panels.
04:05 - Be sure to wipe down dirt and dust using a damp cloth. Wetting the MDF panel a bit will cause it to swell, ensuring the tight bond between panels and glue.
04:22 - Roundover router bit. Rounding the subwoofer box edges for a smooth look and feel.
04:40 - Sanding by an 80 grit sandpaper on a finishing or orbital sander.
04:47 - Painting lacquer primer surfacer paint by brush. Then sand it again with 120 grit sandpaper by hand.
04:56 - Lining the subwoofer internal walls with a poly-fiber material before painting the box with premium house acrylic latex paint.
05:35 - Here's comes the favorite part: Assembly. First by screwing down rubber feet.
06:00 - Bolt down the AIRS PW-280 amplifier board with 4mm Allen Hex bolts and T nuts.
06:38 - Glue down port tube. And stick the subwoofer rubber seal that is included in the JBL Stage 810 box.
07:28 - Solder speaker wires and bolt down with 4mm Allen Hex bolts and T-nuts as well.
07:50 - Voila! Final product showcase.
08:40 - Plugging it in and testing. Track is
www.youtube.com/watch?v=Udsefqice5A by Sandeep Luthra
Category :
#diy#down#firing#powered#subwoofer


![Bassotronics Bass, I Love You slowed [HQ]](https://i.ytimg.com/vi/Z3Jd33yl06M/mqdefault.jpg)


![Bassotronic - Bass i Love You! [BASS BOOSTED]](https://i.ytimg.com/vi/ybVITZ1vuyY/mqdefault.jpg)